Forget depth-based blur that breaks on transparency. IGCSDOF doesn’t fake depth of field from the depth buffer. The result: cinematic, camera-like DoF where glass, hair, particles and translucency finally behave the way they should.
What is IGCS Relay?
IGCS Relay is the link between supported camera providers and compatible DOF renderers.
Normally, IGCSDOF needs a compatible IGCS camera tool to control the camera during a render. IGCS Relay extends that support to other cameras, such as compatible Cheat Engine photo modes, and can now work with both IGCSDOF and MARTY’S MODS Parallax DOF.
For the user, this simply means more games can use high-quality camera-based DoF without needing a dedicated IGCS camera tool.
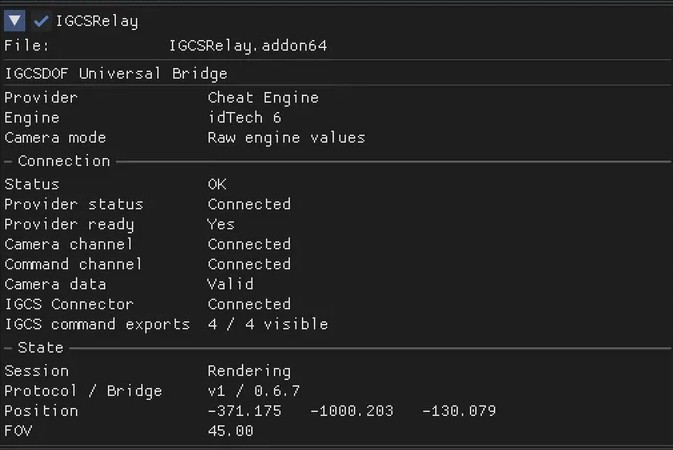
Once the camera is enabled and the Relay status is OK, you can frame your shot, choose your DOF backend, and render as usual. The Relay handles the camera movements automatically in the background.
Required
- ReShade 6.7 or higher with add-on support
- IGCS Relay
- One or both supported DOF backends:
- IGCS Connector by Frans Bouma
- MARTY’S MODS Parallax DOF
- Cheat Engine 7.6 or higher
- A compatible cheat table
Installation
- Install ReShade for the game.
- Copy the IGCS Relay add-on into your ReShade add-on folder.
- Use the correct version for the game:
- IGCSRelay.addon64 for 64-bit games
- IGCSRelay.addon32 for 32-bit games
- Install IGCSDOF, Parallax DOF, or both.
Launch the game and open the ReShade overlay.
You should see the IGCS Relay panel.
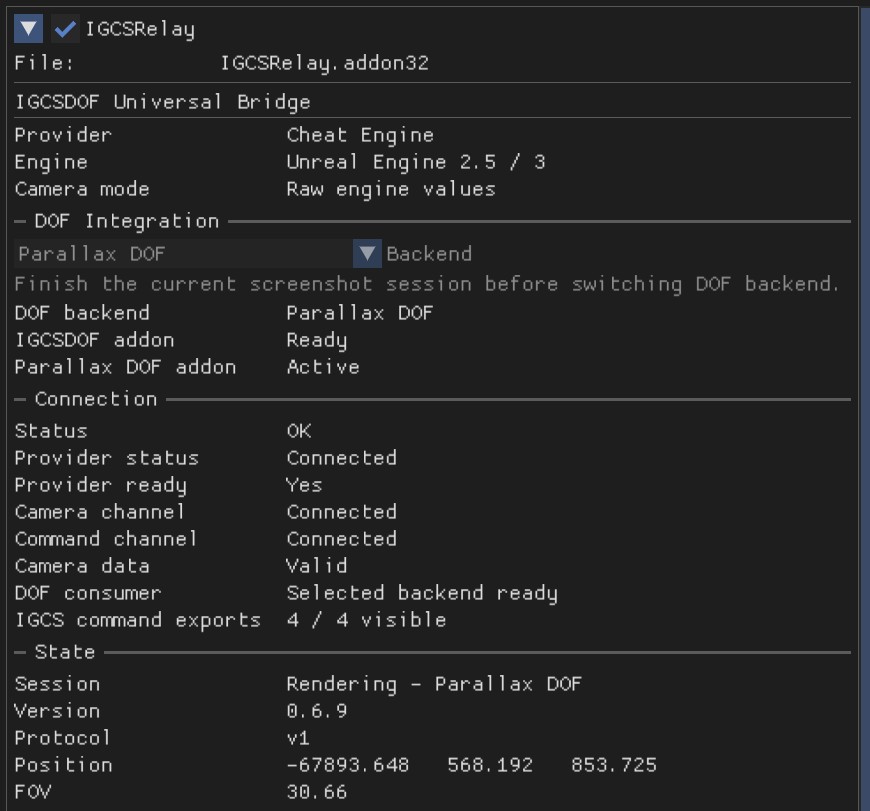
DOF backend selection
IGCS Relay v0.6.9 can keep both supported DOF addons loaded at the same time.
In the DOF Integration section, choose which backend you want to use:
- IGCSDOF
- Parallax DOF
The selected backend is marked Active. The other backend remains connected and is shown as Ready.
If a screenshot session is started directly from either IGCSDOF or Parallax DOF, the Relay automatically detects which addon started it and follows that backend for the session.
Backend switching is locked while a screenshot session is rendering. As soon as the session is finished, you can switch again immediately without restarting the game, ReShade or the Relay.
How To Use
- Start the game.
- Open the compatible Cheat Engine table.
- Attach Cheat Engine to the game.
- Enable the camera / Photo Mode.
- Enable the IGCS support.
- Check the IGCS Relay panel in ReShade.
- Make sure the Relay status is OK.
- Choose IGCSDOF or Parallax DOF under DOF Integration.
- Frame your shot.
- Start your selected DOF renderer.
- Configure focus, aperture, samples and the other renderer settings.
- Start the render.
The selected DOF backend will automatically control the camera during the render.
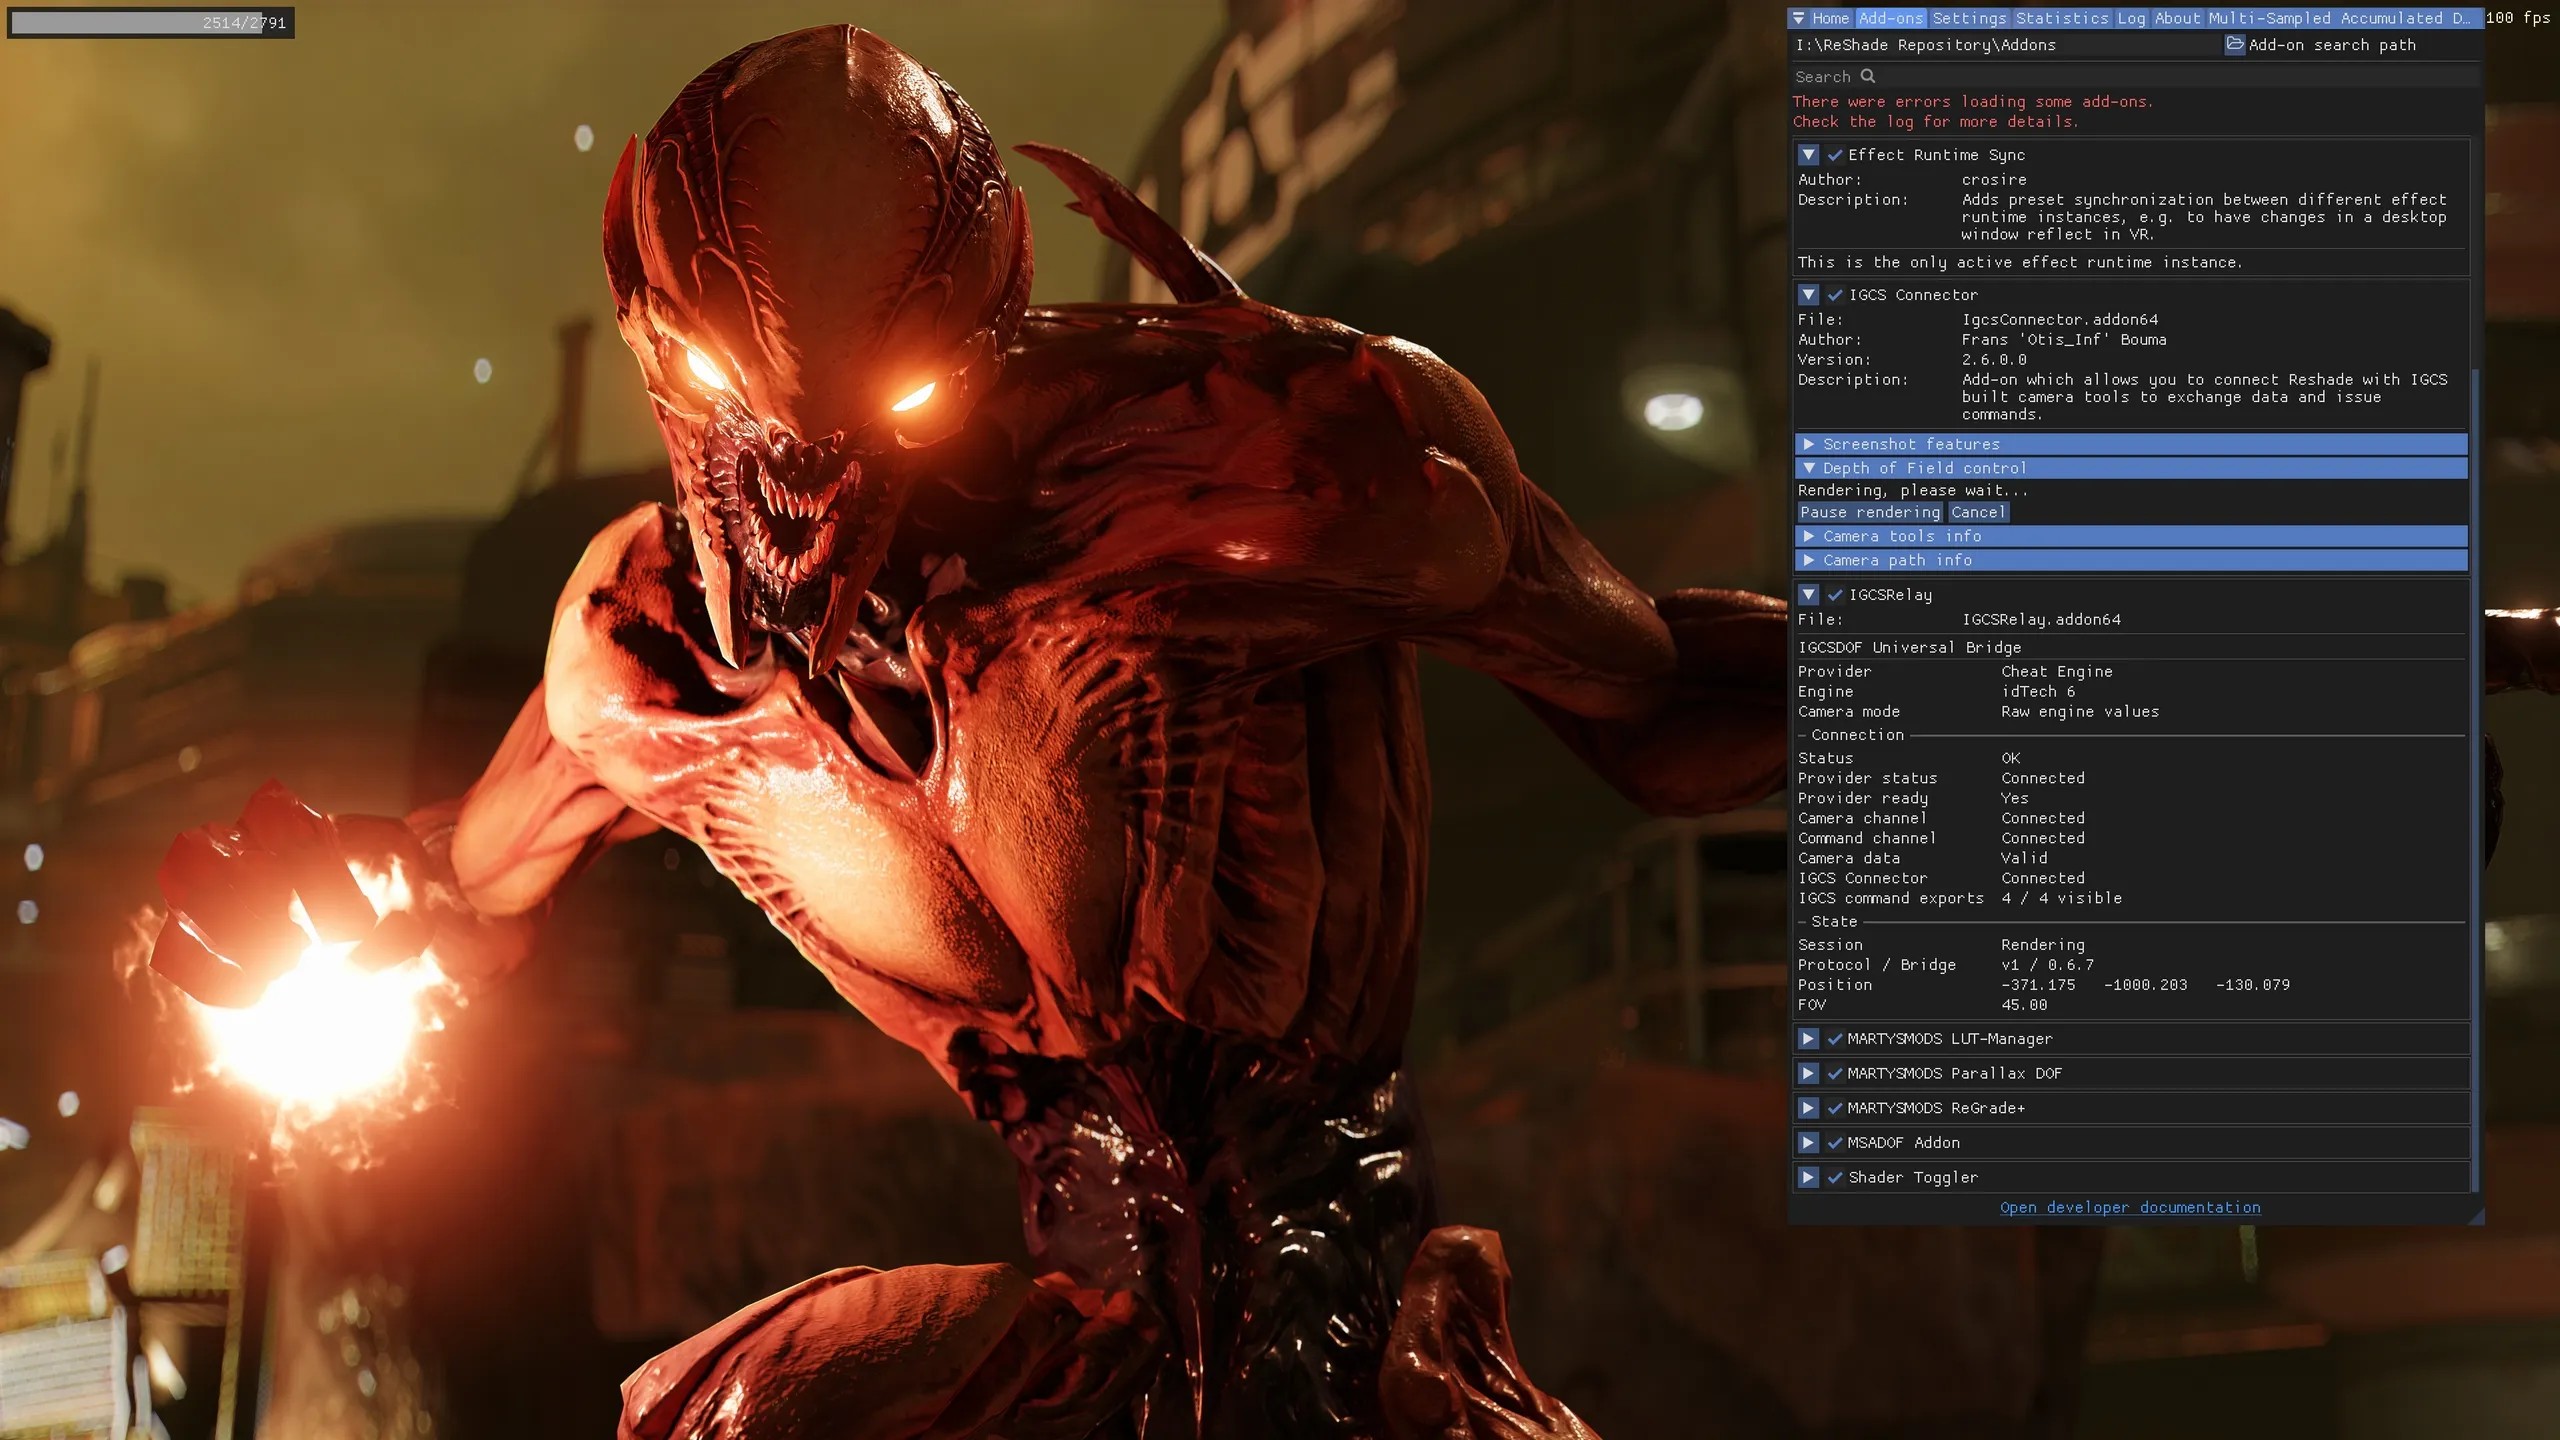
When the render is finished, the camera will return to its original position.
How to add IGCS Relay support to an existing Cheat Engine table
If you already have a working Cheat Engine camera, adding IGCS Relay support is straightforward.
There are now two provider methods. You can use whichever one fits your table or your preferred workflow:
- Auto-detection provider — uses the existing Cheat Engine memory records directly.
- Manual provider — uses explicit camera bases and offsets.
Both providers are added alongside your existing camera script. Do not replace your camera code.
Both already contain [ENABLE] and [DISABLE] sections, so they behave like any other Cheat Engine script: add the provider as a new Auto Assembler script and check the box to enable Relay support.
Method 1 — Auto-detection provider
Download or copy the Generic RAW Provider Auto script.
This provider reads the final addresses already resolved by Cheat Engine. Because of that, it does not need you to manually reproduce the camera pointer chain or enter position, rotation and FOV offsets again.
It can work with camera values stored as:
- direct addresses;
- registered symbols;
- standard Cheat Engine pointer records;
- multi-level pointer chains;
- different pointer chains for position, rotation and FOV.
For example, your table can use a simple camera structure, a deep pointer chain, or even a separate branch such as addr1 for Pitch/Yaw/Roll. Cheat Engine resolves the record, and the provider uses the resulting address.
Preparing the camera records
The auto provider looks for the following camera memory records:
Camera X   or X
Camera Y   or Y
Camera Z   or Z
Pitch
Yaw
Roll
FOV
If your table already has Camera X, Camera Y and Camera Z, you can keep those names.
For rotation and FOV, short clean names are recommended. For example:
PITCH (-16384 to 16384, readonly)  -> Pitch
YAW (0 to 65536, readonly)         -> Yaw
FOV (0 to 170, default 68)         -> FOV
ROLL (0 to 2*pi)                   -> Roll
You do not need to change the address, pointer chain or value type of those records. Only the description needs to be recognizable by the provider.
A typical auto-provider configuration only needs the engine tag:
local CONFIG = {
    engine = "UE3",
    cameraIntervalMs = 16
}
The engine tag is still required because it tells IGCS Relay which camera math to use. It cannot be determined reliably from a memory address alone.
When the provider starts, the Cheat Engine Lua log shows which records were detected and their resolved addresses. This is useful for checking that the expected camera records are being used.
Method 2 — Manual provider
If you prefer to define the camera structure yourself, use the Generic RAW Provider.
This method lets you explicitly define the camera base or bases and every offset used by the Relay.
The important information is:
- The camera base pointer
- Position offsets: X, Y and Z
- Rotation offsets: Pitch, Yaw and Roll
- FOV offset
- The correct engine tag
A typical configuration looks like this:
------------------------------------------------------------
-- USER CONFIGURATION
------------------------------------------------------------

local CONFIG = {

  engine = "UE3",

  bases = {
    position = "pCamera",
    rotation = "pCamera",
    fov      = "pCamera"
  },

  position = {
    x = 0x56C,
    y = 0x570,
    z = 0x574
  },

  rotation = {
    pitch = 0x578,
    yaw   = 0x57C,
    roll  = 0x580
  },

  fov = {
    offset = 0x584
  },

  cameraLockSymbol = "",

  writers = {
  },

  restoreHoldMs = 250,
  cameraIntervalMs = 16
}

------------------------------------------------------------
-- END USER CONFIGURATION
--
-- STOP EDITING HERE.
-- Everything below this line is universal provider core.
------------------------------------------------------------
Engine tag
The engine tag tells IGCS Relay which camera math should be used.
For example:
engine = "UE3"
Use the profile matching the camera representation used by the game.
Camera bases
With the manual provider, you choose which base contains position, rotation and FOV.
In many Cheat Engine cameras, everything is stored in the same structure:
bases = {
  position = "pCamera",
  rotation = "pCamera",
  fov      = "pCamera"
},
If your table uses different structures, each group can use a different base:
bases = {
  position = "getCamBase",
  rotation = "addr1",
  fov      = "addr1"
},
A base can be an existing Lua function, Lua address or registered CE symbol. This means you can reuse camera initialization that is already present in the table instead of duplicating the pointer chain.
Finding the offsets
The easiest way is usually to look at the existing camera script.
If the camera code reads or writes values such as:
[pCamera]+5C
[pCamera]+60
[pCamera]+64
those values are the offsets used by the camera structure.
For example:
position = {
  x = 0x5C,
  y = 0x60,
  z = 0x64
}
Do the same for Pitch, Yaw, Roll and FOV.
Save the table when finished.
You do not need to understand the complete Cheat Engine script. In most cases, you only need to identify the camera data already used by the working camera.
Which method should I use?
There is no required method.
Use Auto-detection when your camera values already exist as clean Cheat Engine memory records and you want the provider to reuse them directly.
Use Manual configuration when you prefer explicit control over camera bases and offsets, or when your table has a special layout that you want to describe yourself.
Both methods send the same camera information to IGCS Relay.
Example
If you want to see how manual Relay support is added to a real Cheat Engine table, have a look at the DmC: Devil May Cry table.
DmC uses the UE3 profile and is a good reference for:
- where to place the Relay Lua script;
- how the camera pointer is connected to the provider;
- how camera offsets are configured;
- how the engine tag is defined.
For the auto-detection method, the important part is simply that the table exposes recognizable camera records for X, Y, Z, Pitch, Yaw, Roll and FOV.